
I'm creating this page to talk a little about the processes used in the work that I normally do, whether in this project or any other of the kind. The process is very similar to that used by scanlation editors when doing redraws. It's nothing too complex, but it usually takes some time.
By the way, I'm no expert on this sort of thing, so a lot of my techniques might not be the most efficient, and I'm not very good with explanations either, but I still want to try to teach some of what I've learned working on scanlation; in case someone eventually tries to do a similar project, or even consider continuing with this one, if I need to stop.
Okay, so let's get started...
First, I would like to discuss some points that I think are important to consider.

Time/Work: You need to know how to balance the amount of work that will be invested in relation to your available time. It may seem like a strange concept in this type of activity, but I consider it to be very important.
How much time are you willing to invest in this specific project you are trying to start?
If you invest more work, the result will be better, but more time will be spent. And if you invest less work, the result may not be very good, but less time will be spent.
So the key is for you to find a balance between these two points, time and work.
If you're working on a manga that you like, or is important to you, you might want to invest more time to get a better result. But in some cases, you'll work on some random manga, and in those cases the best thing to do is to find a balance where you won't spend too much time on the project, but the result won't be that bad.
I'm not very good with explanations, but the idea is: You're basically going to try to find a stopping point where the extra time spent editing is no longer worth the time invested.

Resources: In the case of manga, the resources are the manga themselves. Scanned manga are often called "RAW", and raws are usually divided into 2 main ways, digital and scanned. But personally, I like to divide it into at least 3 ways, and I'll explain why.
Typically, a digital raw is the one that you buy and download online to read digitally. However, in most cases, this digital raw is just a scanned manga, with reduced image quality. But that doesn't mean there aren't truly digital raws. They exist, but are quite hard to find.
That's why I usually divide them into: Scanned, Digital, True Digital.
True digital raws are the best to work with, as they are usually completely monochrome, with no color variation from black to white (or shades of gray). Page resolutions are also typically extremely high; varying around 10000 pixels in height.

Image Editing Software: Honestly, any image editing software can do the job. Even Paint, if you're brave enough. What changes are the tools, but it's all a matter of convenience and habit. Personally, I prefer to use Photoshop, but if you don't want to invest money, you can also use GIMP, or any other free software.
But since I mainly use Photoshop, my tips will be geared towards this software. But that doesn't mean you can't use the same concepts in different softwares, because obviously you can. You will probably just need to test the methods a little more.
Now, on to the good parts...

Decensoring:
In this project, "Ecchi Extended", aside from the basic edits, I mainly deal with censorship removal. But to be honest, the concepts are the same as any manga redraw, so you can also use the methods for SFW manga.
There are several types of censorship, but usually you will find three main types: Full Censorship, Pixelization, Censor Bars.
Note: I'll explain a little bit about each of the censorship types, but I usually only remove censor bars — exceptions are rare, so my tips will mainly focus on this specific type.
Full Censorship: Normally, in the case of full censorship, it's not even worth wasting your time trying to remove the censorship, as there is no reference for you to use as a basis for the work.
But of course, there are exceptions. For example, in some cases the author/artist may release some examples of the manga production process, and in these processes it may be possible to find something to use as a reference for removing the censorship. Some artists like to stream while they are working, while others post these examples on their social media pages such as Twitter, Pixiv or Fanbox.
Here's an example:

It's also possible to remove this type of censorship by the approximation method. In this case, instead of using a reference from the same manga, you use an image from another manga (preferably by the same author) where the character is in a pose similar to the character you want to remove the censorship. This process is usually easier to do with manga by authors who also work with hentai. But to be honest, I don't really like this method because you're guessing what the image should look like, instead of redrawing it the way the author himself imagined.
...
Pixelization: With pixelization-type censorship, it's also not worth trying to remove the censorship; at least in most cases. This type of censorship is usually applied similarly to full censorship, so you miss a lot of the lines used as a reference.
If the censorship is applied only to specific parts, it may be possible to redraw those parts using the uncensored parts as a reference.
If it's a color page, it's also possible to use some AI algorithms to try to remove the censorship automatically, but it's still recommended to do some manual retouching, as the altomatic results are usually not very efficient.
At the moment I don't even have examples for this kind of censorship removal. Maybe in the future, if I do such a removal, I'll update the page with some examples.
...
Censor Bars: Now we're talking. As you might guess from the name, censor bars are literally bars being used as a form of censorship. This type of censorship is one of the most common, and luckily it leaves a lot of parts of the image being censored uncovered. And we use these uncovered parts as a reference to do the decensoring.
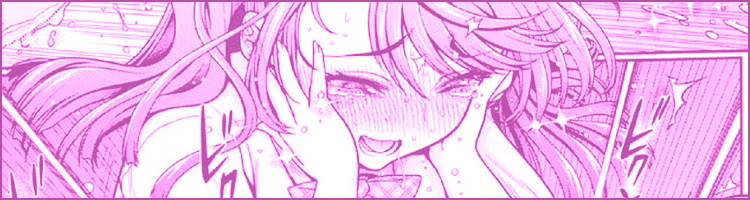
Now, as an example for removing this kind of censorship, I'll use a page from the Tsugumomo manga. Here is the image, in case you want to try repeating the processes: Link
I'm using an outdated version of Photoshop (probably from a few years ago), but any version will do the job. If you have an even older version, don't worry, the editing methods will probably not be different.
- First, just open the image with Photoshop. If your program is already open, press [ctrl + o] and search for the image.
Now, if you take a closer look, you'll notice that the censor bar on this page is pink, not black (as is the case most of the time).

So we need to convert the image back to completely black and white.
This step is very important for manga that are normally black and white, as it is common for the image to suffer from noise after numerous conversions, so transforming the image back to black and white can remove these random colors in the image.
- You can use whichever method suits you best, but in this example I will use desaturation; with the layer selected, just press [ ctrl + shift + u ].
Now with the image desaturated, I usually create two new empty layers to work on the decensoring.
- Press [shift + ctrl + n], then confirm with the OK button.
On the first layer, I usually rename it as "base".
- To do this, simply double-click on the layer's name, and then rename the layer. Or else you can go to the top bar and then [ Layer > Rename Layer ] then rename the layer.
Now, using the previous methods, create one more layer and rename it "lines". If you're following the steps correctly, your layers should look like this:

- Now select the "base" layer, then select the "Rectangular Marquee" [ m ], and with the tool selected, select the entire censor bar.

In this case the censor bar was completely rectangular, in addition to being correctly aligned horizontally, so it was easy to select. But if the bar had some different alignment, or different shape, we would have to use different selection tools.
Tools like "Polygonal Lasso" [ L ], "Pen" [ p ] or "Magic Wand" [ w ]. If you want to learn more about this type of tool, check out: Link
- Now select the "Paint Bucket" tool [ g ]. Then change your foreground color to full white (#ffffff); to do this, just click on the upper color square at the end of your toolbar, then set the color to (#ffffff) and select the OK button.
You can do the same using the shortcuts [ d ] to reset the colors, and then [ x ] to invert the foreground color with the background color.
- Now with the white color selected, just click inside the selection made earlier.
- Now press [ ctrl + d ] to undo the selection.
If there is any leftover from the censor bar, you can use the "Brush" [ b ] tool with the white color selected to paint the remaining parts.
Now your image should look like this (but in this example, it's zoomed in):

I did this because on black and white pages, it's easier to work with the censor bar in white. This creates an effect as if the bar has been completely removed from the page.
Now that the foundation for the work is set, the creative part comes in. You can continue each of the following steps in many different ways, and with many different tools. So don't take my considerations as definitive, just consider them as one of the possible options. But anyway, to simplify a bit, I'll just use a few specific tools.
First, we need to fill in the empty spaces with the same patterns as the background. In this example, I will use the "Clone Stamp" tool [ s ] to reconstruct the background, but you can try with different tools, like the "Spot Healing Brush" tool [ j ], or even more directly with the "Brush" tool [ b ].
If you still don't know how to use the "Clone Stamp" tool that well, I recommend the article on this site: Link
It's a great tutorial for using this tool in manga redrawing.
Anyway, this part is a bit tricky to explain step by step as it's basically a trial and error process. You basically need to fill in the missing part with the background patterns.
Try copying the surrounding details using the clone stamp tool, which is a tool that gives you considerable freedom to work with. Also, remember to change the brush size from time to time on the property bar, at the top of the screen, to better suit each situation (you can also change the brush size with the shortcut [ alt + "right click" + "horizontal mouse movement" ]). And for this kind of redraw I recommend the brush hardness at 100%.
Note: With the "Clone Stamp" tool selected, remember to change the sample mode to [ All Layers ]. This option is on the property bar at the top of the screen.

...
With some quick work, I arrived at this result:

It's far from perfect, but it's enough for this example. And this is a good situation to reinforce what I said at the beginning about time/work. If you have enough free time, you can work on the image until the result is perfect, but since this is just an example, I decided to invest less work to save myself time.
- Now switch from the "base" layer to the "lines" layer. You just need to click on the "lines" layer to do this.
Now, to redraw the missing lines from the image, I will use the "Brush" tool [ b ]. But again, you can do the same with several different tools, like the "Pen" tool [ p ] for example, which is better for working with curves.
- Set the brush size to 1 pixel, zoom in on the image with the "Zoom" tool [ z ] (you can also zoom in and out using the shortcut [ alt + "mouse scroll" ]), and try to redraw the piece that is missing from the diagonal line.
At first it may seem a bit complex, but it is actually a very simple process.

Now comes the part that can be a little tricky. To redraw the main lines of the drawing, you will need to find some connection points. This is done to avoid the redrawing straying too far from the original design. In some cases you will need to be more creative than usual, but whenever possible I recommend you try to follow as much of the original design as possible.
Here is the zoomed in image:

I made some circles to better define the connection points, and as you can see in the image, we will need to connect three different lines. Obviously the circles are for demonstration purposes only, you don't need to draw them.
Now to redraw the lines, I recommend the same settings as before, with the brush size set to 1 pixel. If you need to draw a thicker line, you can use a larger size, or you can simply swipe the smaller size brush more than once for better control of the thickness.
To get as close as possible to the original design, you should use the visible parts of the line to define the correct curvature of the missing part of the line.
If the visible parts aren't enough to use as a reference, you'll need to get creative to fill in the missing information. But again, just try not to overdo it too much so you don't stray from the original design.
Here is the zoomed in result:

Here is the zoomed out result:

It may not be completely faithful to the original design, but it's a reasonable result considering the limited amount of information in the original image to use as a reference. In other words, it's close enough.
Now you can save the new version of the image. Just in case, I always recommend that you save a psd version, in case you need to edit something, and then save it in the final image format.
- To save, press [ shift + ctrl + s ], or go to the top bar and then [ File > Save As... ], then set the type to "Photoshop PSD" and click the Save button.
Then do the same again but set the type to the final format that will be used in the image, be it jpg, png or any other.

Well, that's it for now. I know they were very simple explanations and tips, but this post was more aimed at people new to the subject.
And by the way, later I'll add a few more examples, including an example for a color image. But this type of post is quite time consuming, so it might take a while.
Anyway, I hope you learned something new.
...


No comments:
Post a Comment